Overview
Google Analytics 4 is a web analytics service that tracks and reports website traffic on how users interact with your website. In addition to tracking, Google provides key insights into how your website is performing and what you can do to meet your goals.
How to get documentation from Google Analytics 4?
- Using your CSUEB faculty account go to: https://analytics.google.com
First of all, an account would need to be created by via Service Desk.
Note: If you do not see the Analytics Dashboard below, click on the accounts drop down and select
CSU East Bay Website > Main Site-GA4 - Cross Domain
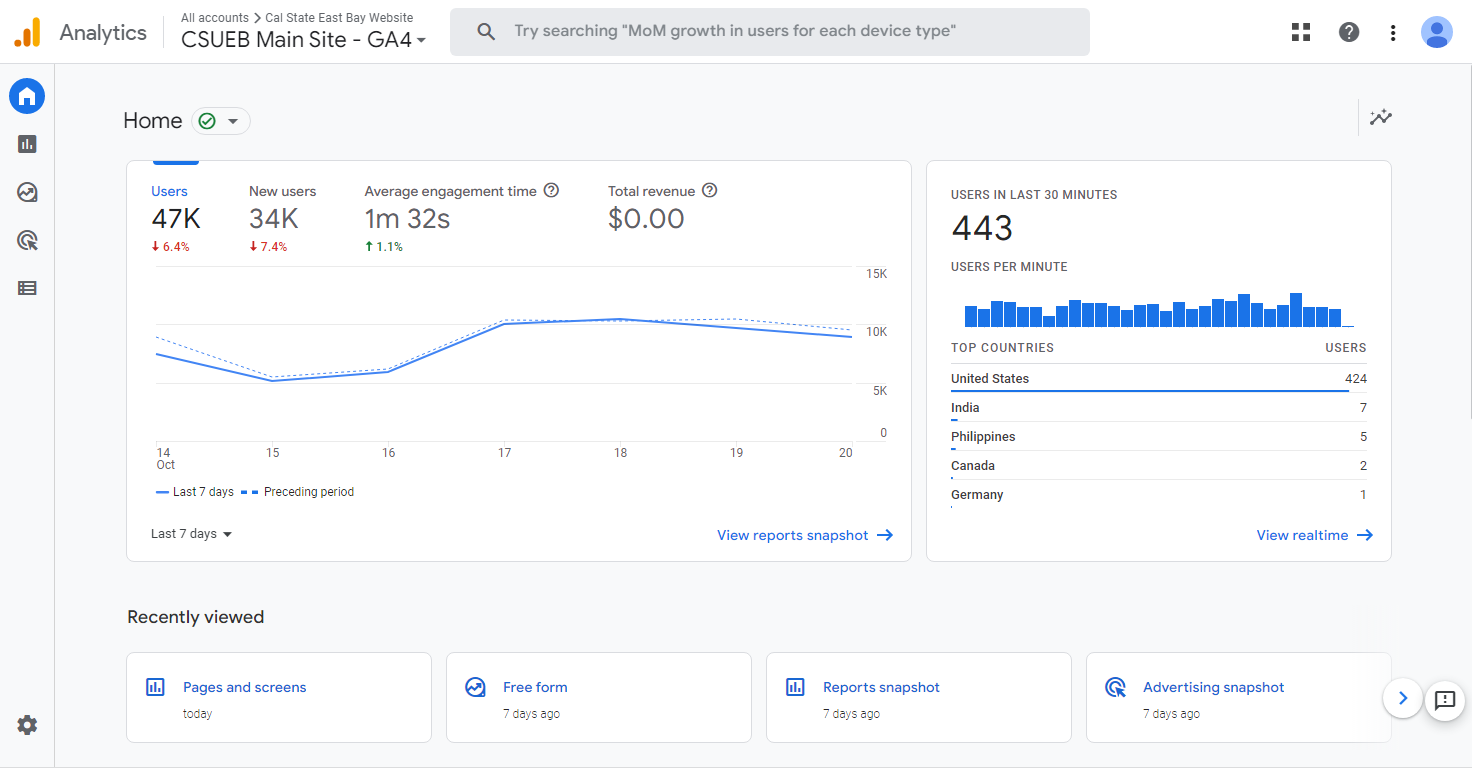
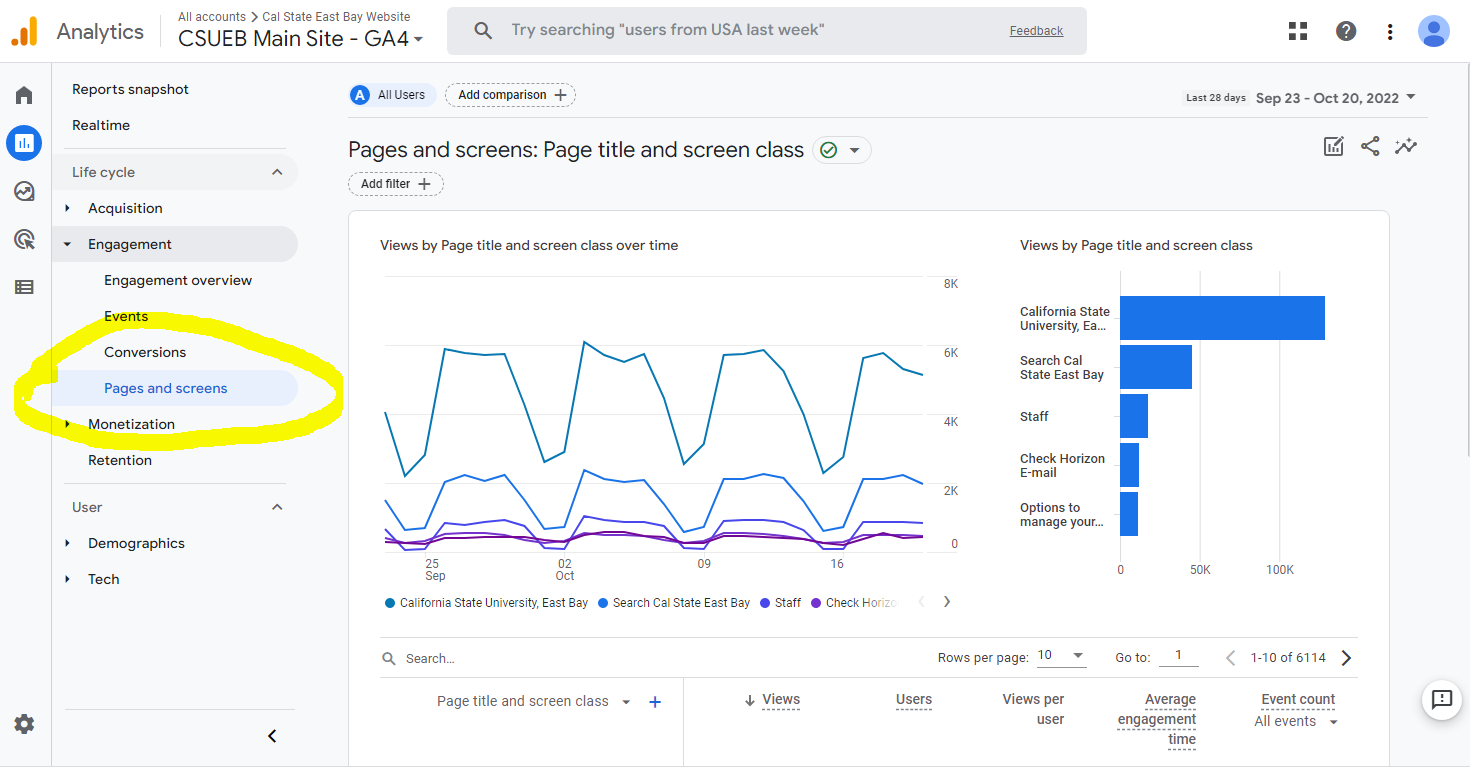
- Navigate to your site report by using the left panel and selecting
Reports> Engagement > Pages and screens
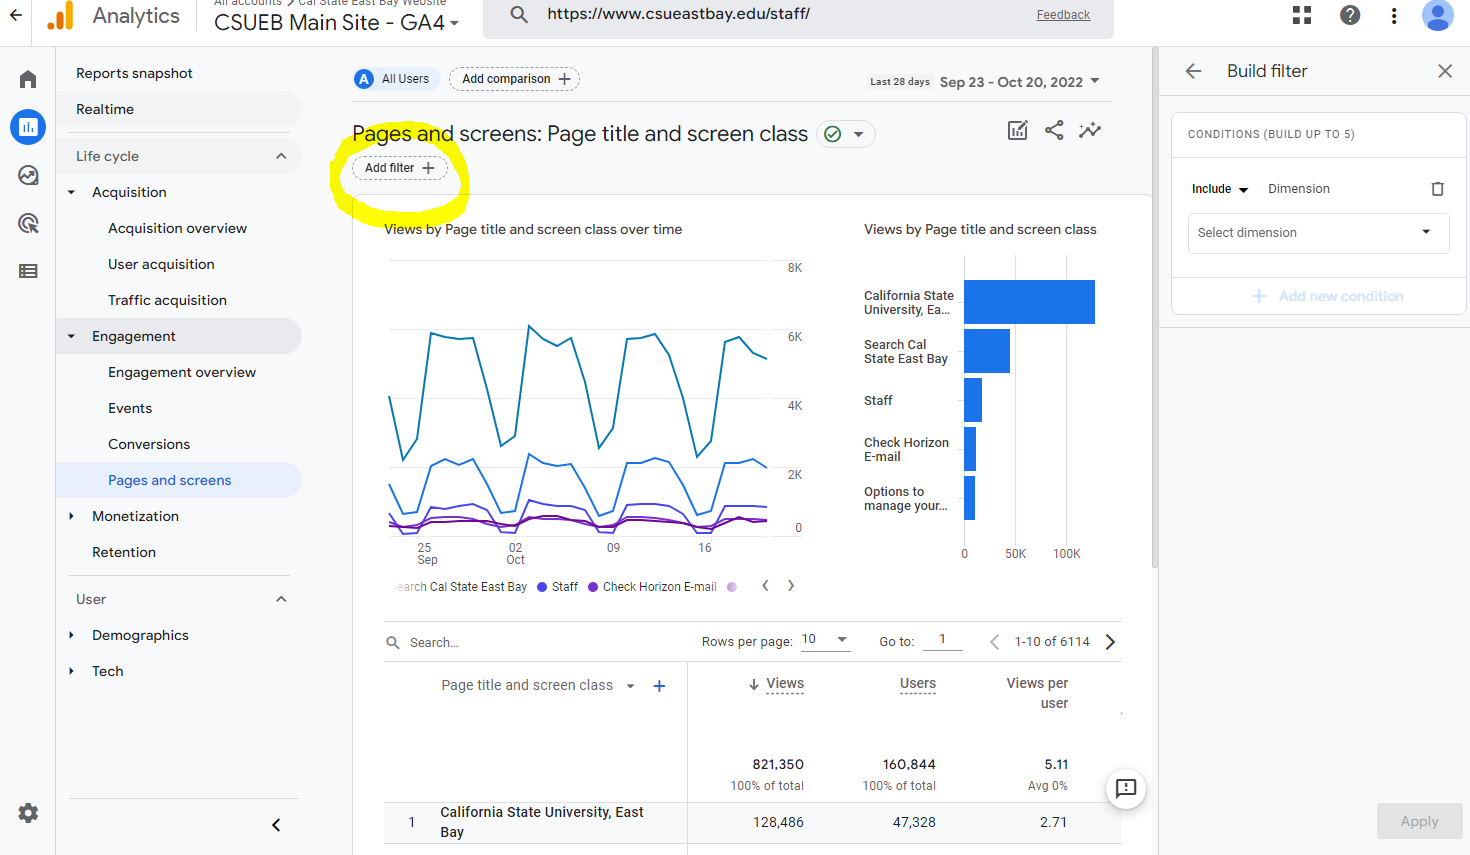
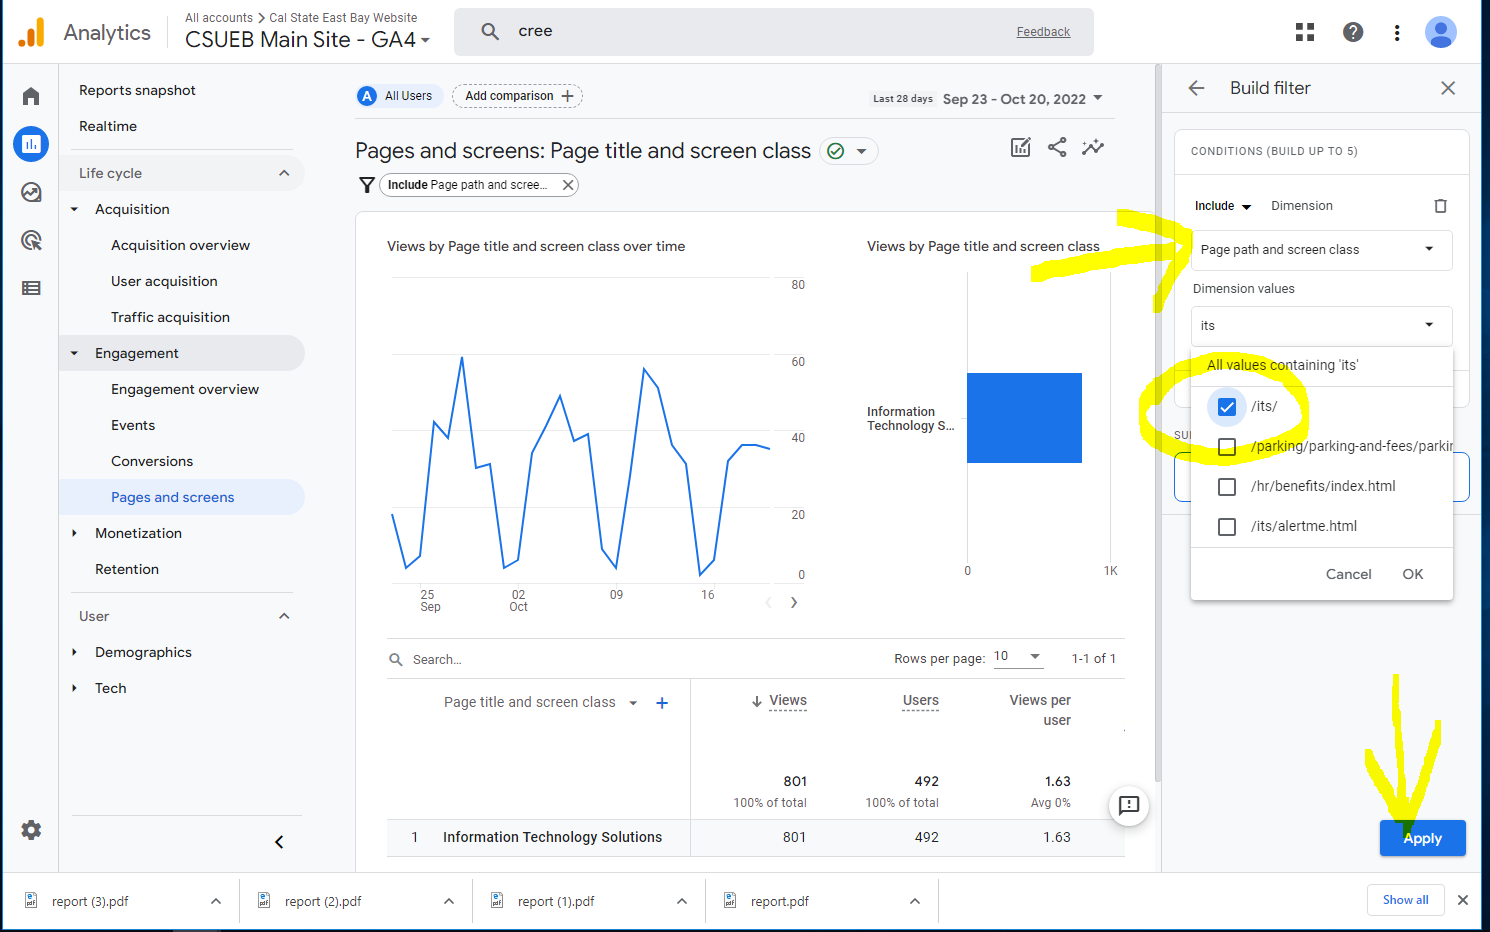
- 'Add filter'
- input your site using the following format: www.csueastbay.edu/your-site to see your analytics 4 data
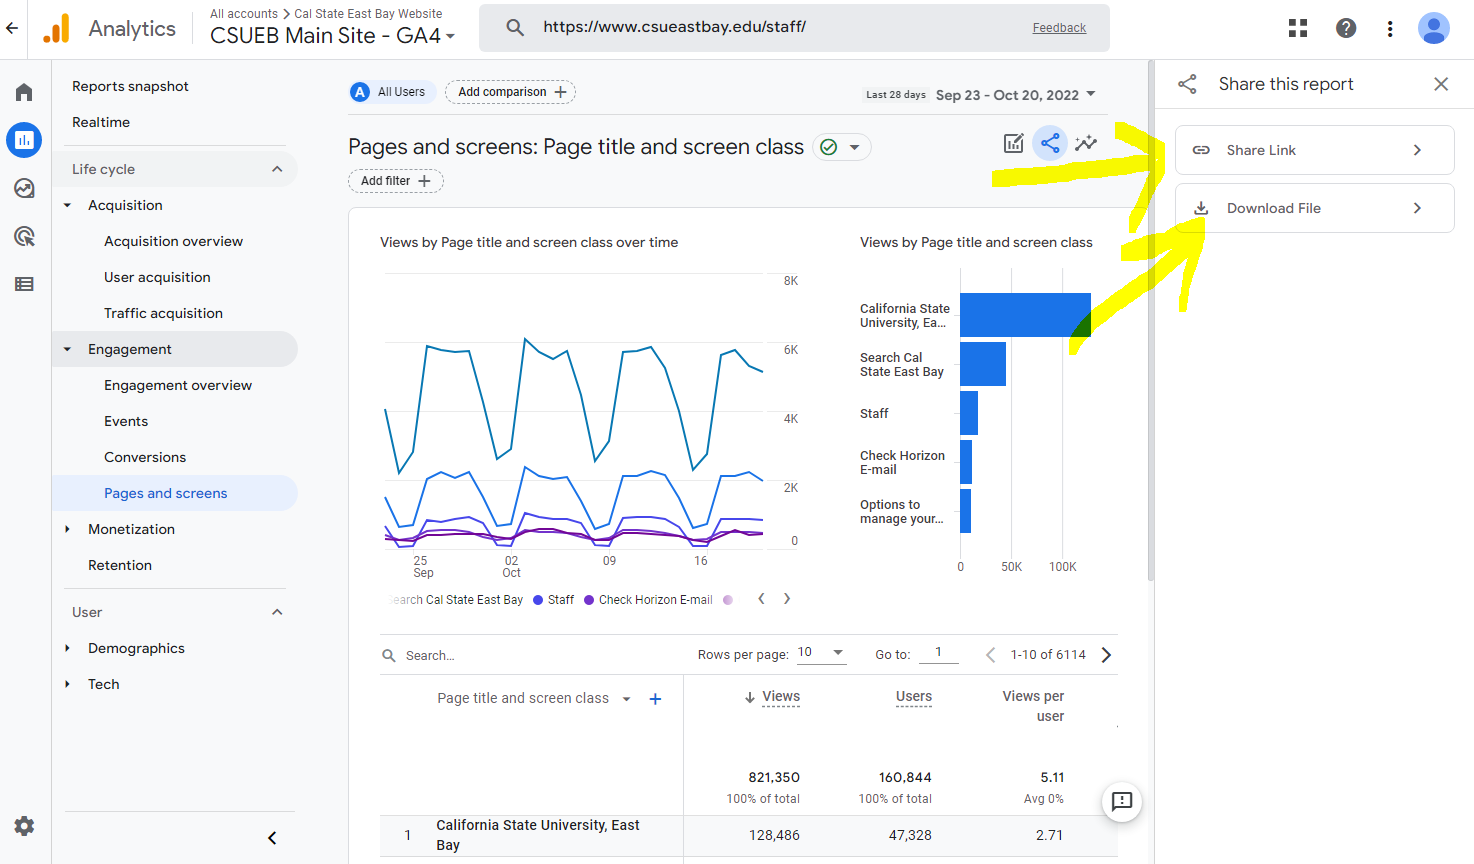
- In Google Analytics 4 you will able to see 'Share Link' and 'Download Link' options(we will not able to creating periodic reporting anymore )also you can share the links with who needs but make sure their accounts should be created from via ServiceDesk.
But this is where email alerts and sharing reports come in. Even though you can’t set up recurring email reports for your GA4 property, you can still export and share them, and you can set up recurring alerts for your automated insights.
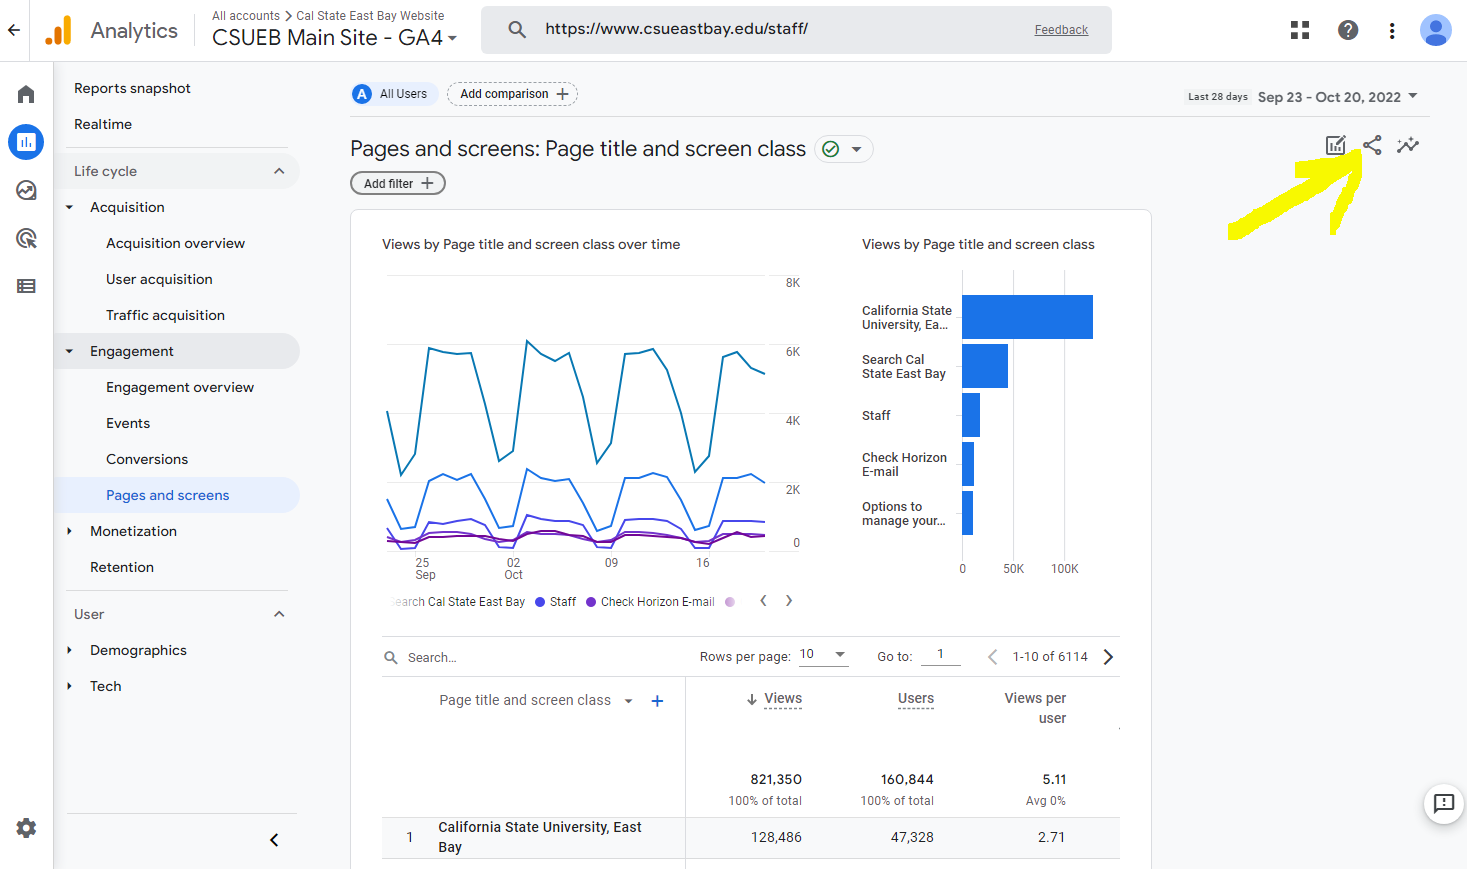
To share your GA4 reports, simply go to the report you want to share. Here, we’ll go to our “Acquisition Overview” report.
Once you’re there, look at the top and click on the share icon. You’ll see a side menu come up with options to share by copying a link to the report, or you can download it.
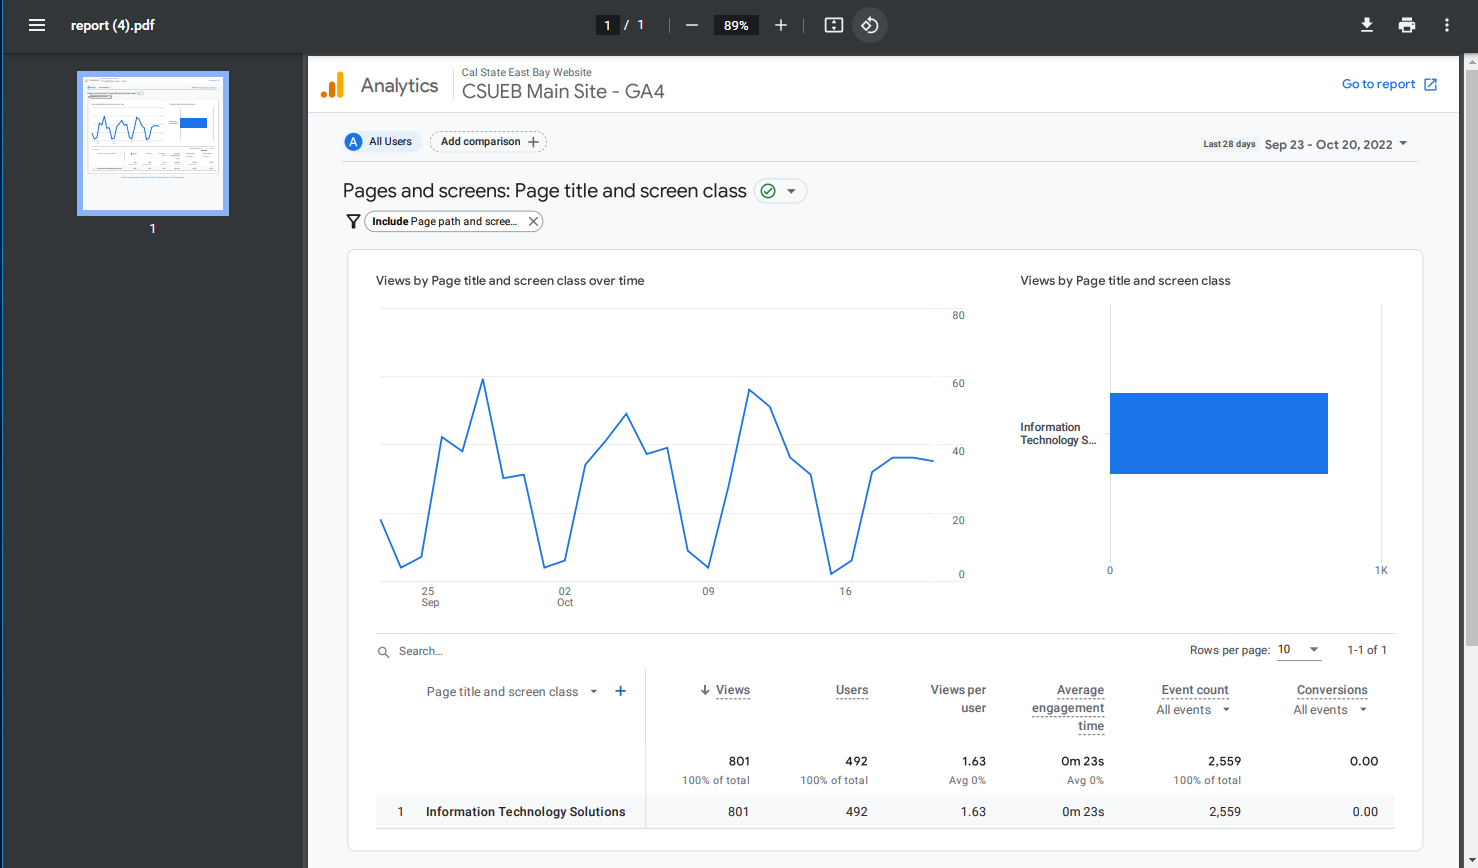
When you order a download from a site by Analytics 4, your document will look like:
This REPORT created for ITS WEB SITE.
- To find the reports a specific site, click on 'add filter' at the right hand side you will see the 'BUILD FILTER' screen,you need to select 'PAGE AND SCREEN CLASS' and search for the 'site name, write the abbreviation of the section you want to reach.
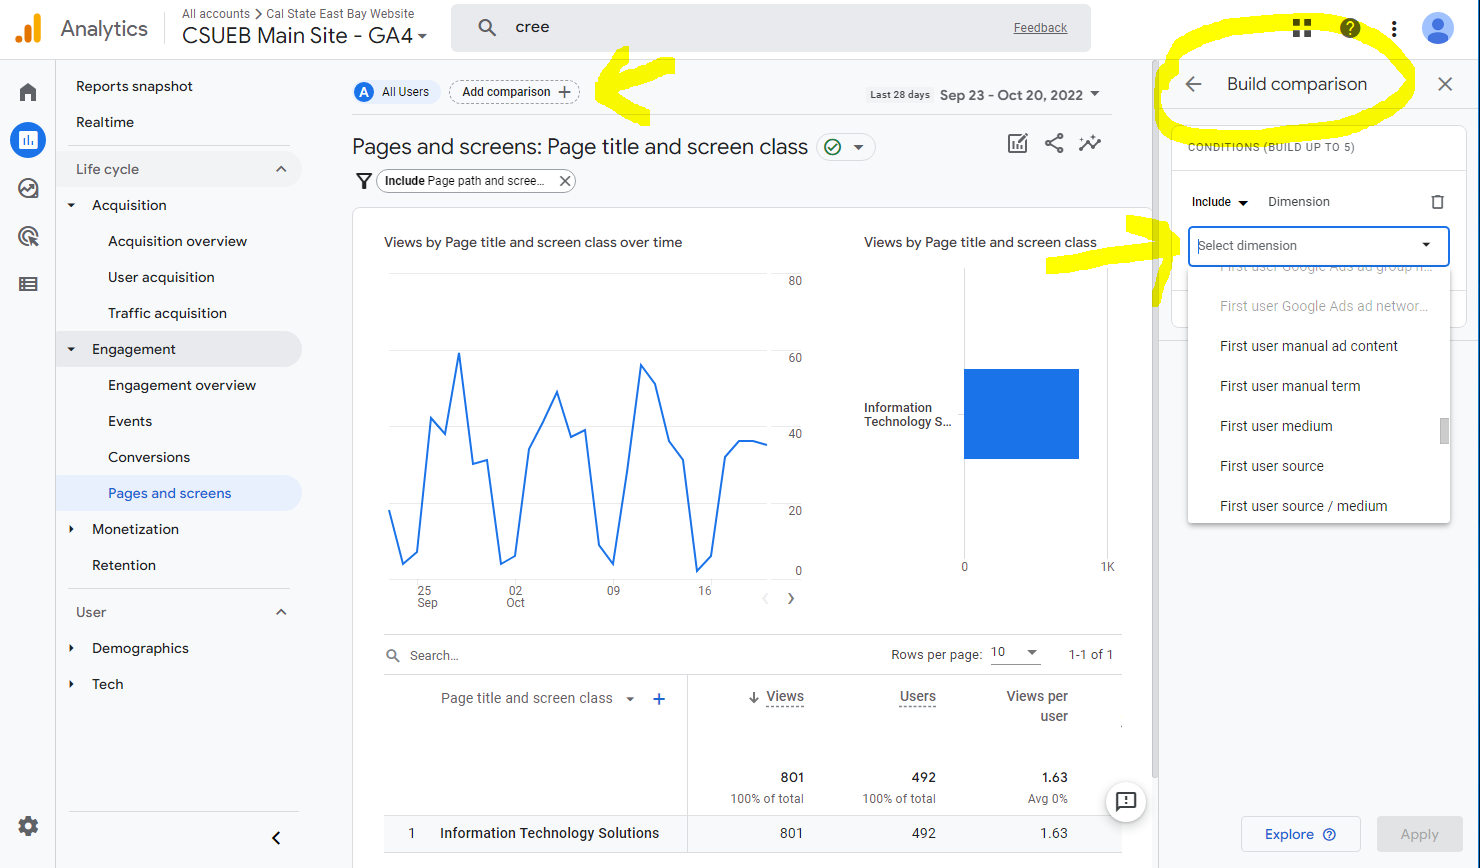
You can use 'build comparison' for building new comparisons as well.
WHAT ARE AUTOMATED INSIGHTS?
First, let’s discuss what automated insights are, and then we’ll show you how to configure regular updates in your email. Automated insights are generated by Analytics to alert you to significant shifts and trends in your data. When Analytics notes a trend or a sudden change, it will automatically generate insights for your review.
Automated insights identify user trends and alert you to noteworthy activity in your GA4 property. Analytics will generate insights for you automatically, but you can also create custom insights based on your needs.
You can share and export your automated insights, which is a great way to spread important news quickly. You can also set up recurring email alerts for your automated insights, which is one of our suggested workarounds for the lack of recurring email reports in GA4. We’ll discuss how to configure regular email alerts for your automated insights in the next section.
HOW TO SET UP RECURRING AUTOMATED INSIGHT ALERTS
To add custom insights, contact your admin for edit or collaborate rights to your SITE(your property)!
Okay, so let’s jump into how to access your automated insights and how to set up your recurring email alerts.
To get to your automated insights, just go to the left-hand menu in your Analytics property and click “Reports.” When you look to the right, you’ll see your automated insights in a snapshot.

You’ll see several automated insights once you’re inside, and there are different ways you can interact with your data.
But as we mentioned, you can also set up recurring email alerts for your automated insights. To do this, first, click “view all insights” at the bottom of your automated insights snapshot.

You will then need to create a custom insight. You can configure this insight to be sent to your email every time it’s triggered. This will alert you to important trends you want to monitor.
To get started, click “Create.”

You’ll then see a list of suggested automated insights. These are the ones Analytics suggests you set up based on your property. You can also create a completely new automated insight from scratch.

For now, we’ll focus on creating one of the suggested insights. Here, we’ll select the “Anomaly in daily users” insight. This means Analytics will alert me if there is a significant change in the normal amount of daily users on my site or mobile apps. To begin, just select “review and create.” Once you do that, you’ll see a menu with options open up.

You’ll see you can adjust your insight based on how frequently you want it to be monitored, how significant of a change you’re interested in, and the kind of user.
You can also click “Change” to add up to five segments to this insight. This means you can set up comparisons, which can be extremely useful for quick data analysis. When you click “Change,” you’ll see a new menu that lets you set up your segments.

Finally, you can add email addresses at the very bottom of your custom insight. Each email address you enter will get an alert when your insight is triggered. This is huge if you’re a provider and need to keep your clients in the know. It’s also very helpful for alerting other team members to significant changes in your property.
When you’re finished customizing your insight, click “Create” at the top of the page.
And that’s all there is to it! You’ll now be notified whenever this insight is triggered. Depending on your needs, you can set up all kinds of alerts. For example, you might set up an alert for when your traffic drops by a certain amount. Or you may want to set up an alert to monitor when a certain event/conversion from a new campaign is triggered.
These alerts can keep you on top of your new and existing campaigns and monitor any significant changes in your GA4 property, so take advantage of your automated insights! They are a great way to simplify your data and save you time.

Thanks for listening us!