Virtual Computing (AppStream)

What is AppStream?

Appstream is a Chancellor's Office-sponsored virtual desktop application streaming service that allows Cal State East Bay students, faculty, and staff to access Windows applications using a browser, anywhere, anytime, from any supported device.  There are two 'flavors', Standard and Graphics-intensive.
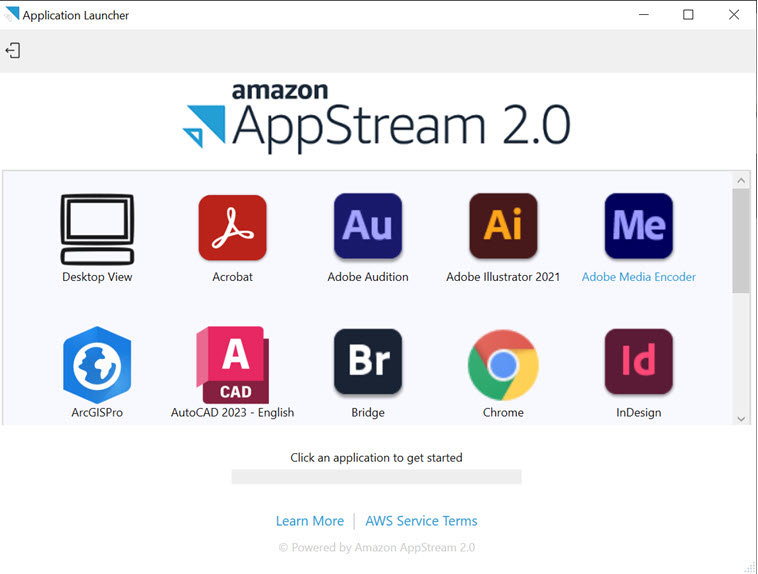
appstreamconsole.jpg
AppStream Console


How to Access AppStream?

  1. As AppStream was designed to run in a browser, no software download is required.
  2. View the two application stacks below to see which applications are available
  3. Select and click the link that runs the software you are interested in using.
  4. Log in using your NetID
  5. Select the application you want to run.
    - 'Be Patient': Note that it may take up to 4 minutes to attach to a running image.

    - Note also that there are currently no MacOS or Linux applications available.
  6. At this time, no Linux or MacOS apps are available in AppStream.

    For a complete list of available software, please see our Apps Catalog.


Application Stacks

Apps available in standard AppStream image

 Standard Appstream Link

  • Google Chrome
  • Microsoft 365 Version 2103 (Build 13901.20400)
    • Access
    • Excel
    • Powerpoint
    • Publisher
    • Word
  • Minitab v22 (64-bit)
  • SPSS 29


 Graphic Appstream Link

  • Adobe
    • Acrobat Pro DV Version 2021.001.20155
    • Audition Build 14.2.0.34
    • Bridge Version 11.0.2.123
    • Illustrator 25.2.3 (64 bit)
    • InDesign 16.2.1 x64
    • Photoshop Lightroom Version 3.4
    • Media Encoder Version 15.2 (Build 30)
    • Photoshop 22.3.1 Release
  • ArcGIS Pro 2.7
  • Autodesk AutoCAD 2023 Version R.24.2.0
  • Google Chrome
  • Microsoft 365 Version 2103 (Build 13901.20400)
    • Access
    • Excel
    • Powerpoint
    • Publisher
    • Word
  • Solidworks 2013-2014/2013 SP2.0
  1. Go to Standard Appstream or Graphics Appstream and click on the app you wish to access. (Links are active in the above headings).
  2. Login with your CSUEB credentials
  3. You will be redirected to an Appstream page with the applications
  4. Choose the application that you would like to use and the virtual session of the applications will be ready in approximately 2 to 4 minutes. 
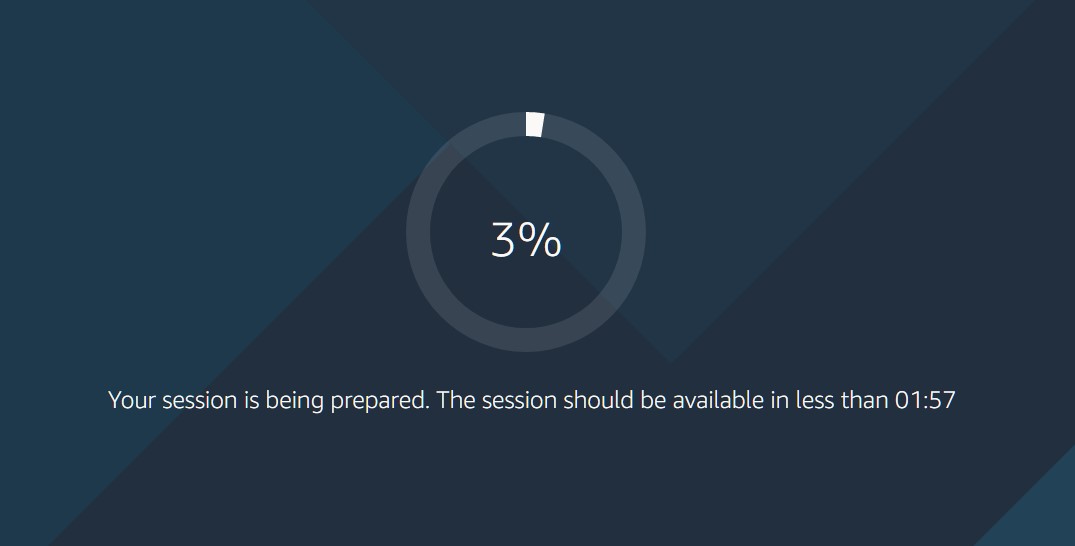
    appstream_loading.jpg

  5. Setup Google Drive for saving files (one time task per stack).
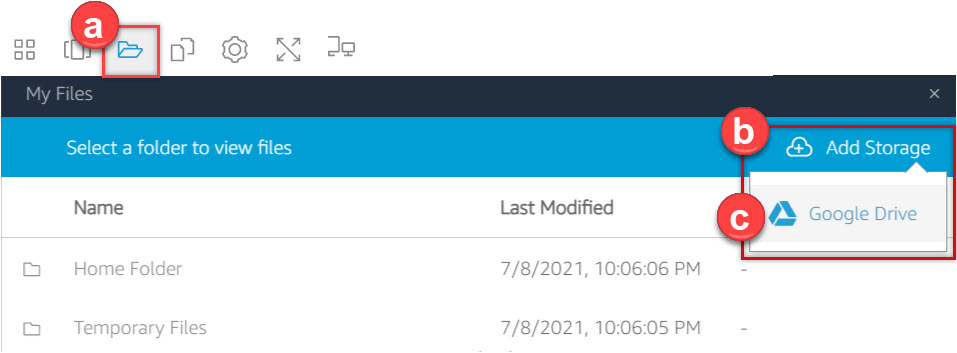
    1. Click the My Files icon
    2. Click Add Storage
    3. Click Google Drive

      add_storage

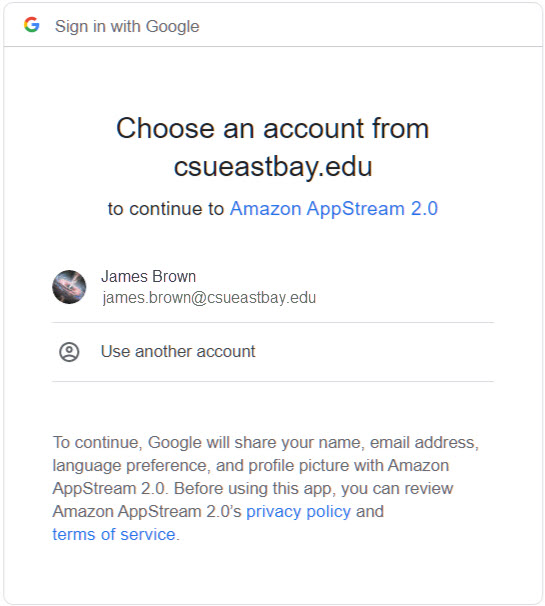
  6. Click @csueastbay.edu or @horizon.csueastbay.edu, and click Accept to allow connection. (Faculty/Staff select @csueastbay.edu. Students select @horizon.csueastbay.edu)
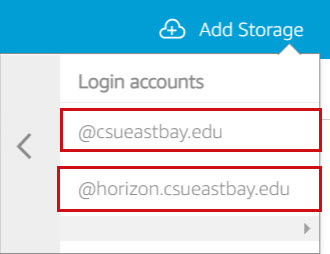
    login_account

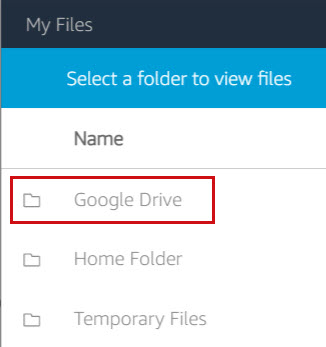
  7. Wait for Google Drive to show up above Home Folder or Temporary Files location.  Be sure to save files in your Google Drive folder.  Do not store files on the Home Folder or Temporary Files folder as those files will be deleted when your session ends.
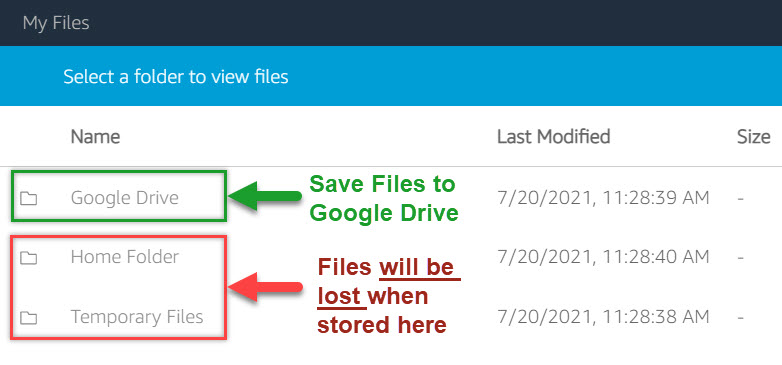

    file_lost

How-to video: Adding Google Drive to AppStream

initial-load and timeout warnings
Warning


Please note:

  • Upon the first launch, some apps take longer to load. Subsequent app connections should result in faster loading times.
  • Appstream 'times out' after an hour of inactivity.
  • If the user selects and runs one of the Microsoft 365 applications (e.g. Excel), they will need to log in to the 365 screen with their campus Microsoft account (see image below)
 

appstream-microsoft-login.jpg

Getting Started With Virtual Computing

To access your Google Drive during AppStream sessions, you must first add your Google Drive account to AppStream.

  1. In the AppStream session, choose the My File icon at the top left of your browser

    My drive

  2. In the My Files dialog box, choose Add Storage, then click Google Drive

    add_storage

  3. Under Login accounts, choose @csueastbay.edu or @horizon.edu
    (If you are a student choose @horizon.edu. If you are a staff/faculty choose @csuastbay.edu.)

    login_account

  4. The Sign in dialog box displays. Type your user name and password for your account when prompted, then sign in.

    sign-in_google
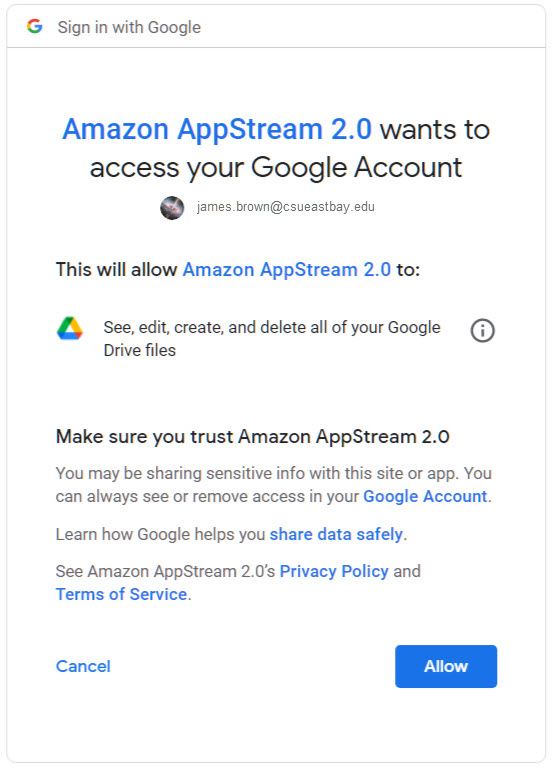
  5. Click Accept when asked for permission to run the application
    allow_google

  6. After your Google Drive account is added to AppStream, your Google Drive folder displays in the My Files dialog box.

    google_drive_folder

  7. To work with your files and folders in Google Drive, choose the Google Drive folder and browse to the file or folder you want. If you do not want to work with the files in Google Drive during the streaming session, close the My Files dialog box.
  1. In the AppStream session, choose the My Files icon at the top left of your browser
  2. In the My files dialog box, choose Google Drive
  3. Navigate to an existing folder, or choose Add Folder to create a new folder
  4. When the folder that you want displays, do the following:
    1. To upload a file to the folder, select the file that you want to upload, and choose Upload Files
    2. To download a file from the folder, select the file that you want to download, choose the down arrow to the right of the file name, and choose Download.
  1. In your application, from the File menu, select Open.
  2. Click This PC, then Google Drive.
  3. Select the desired file, then click Open.
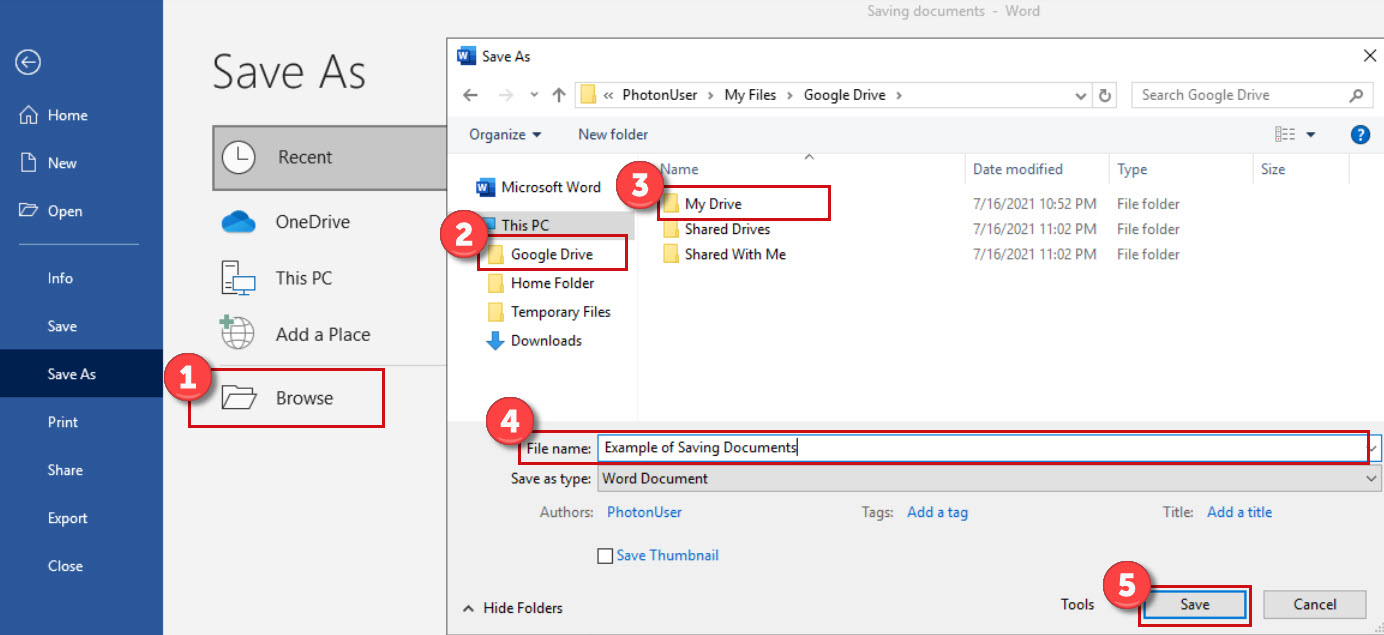
  1. In the current application, from the File menu, select Save As.
  2. Click Browe folder, This PC, then Google Drive. Select which folder in your Google Drive you want to save in.
  3. Name your file, then click Save.

    Saving Files
  1. From within any application in AppStream, choose File > Print
  2. Choose the DCV Printer and select Print

    Print
  3. An additional browser window will open with your print job in PDF format. You can then select to print this PDF file to any printer mapped to your local device, by clicking the print icon.
pdf

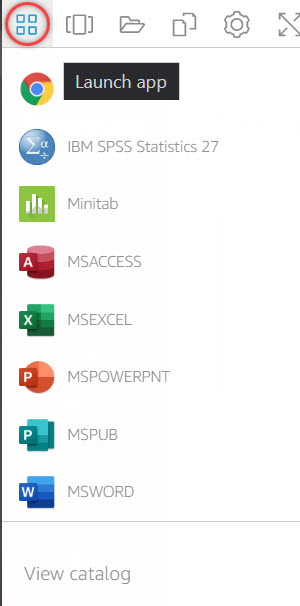
In the ApplStream navigation bar, click the Launch app icon (the four-squares icon). The List of applications available in your stream will be displayed.

Click the desired app to launch it.

launch_app

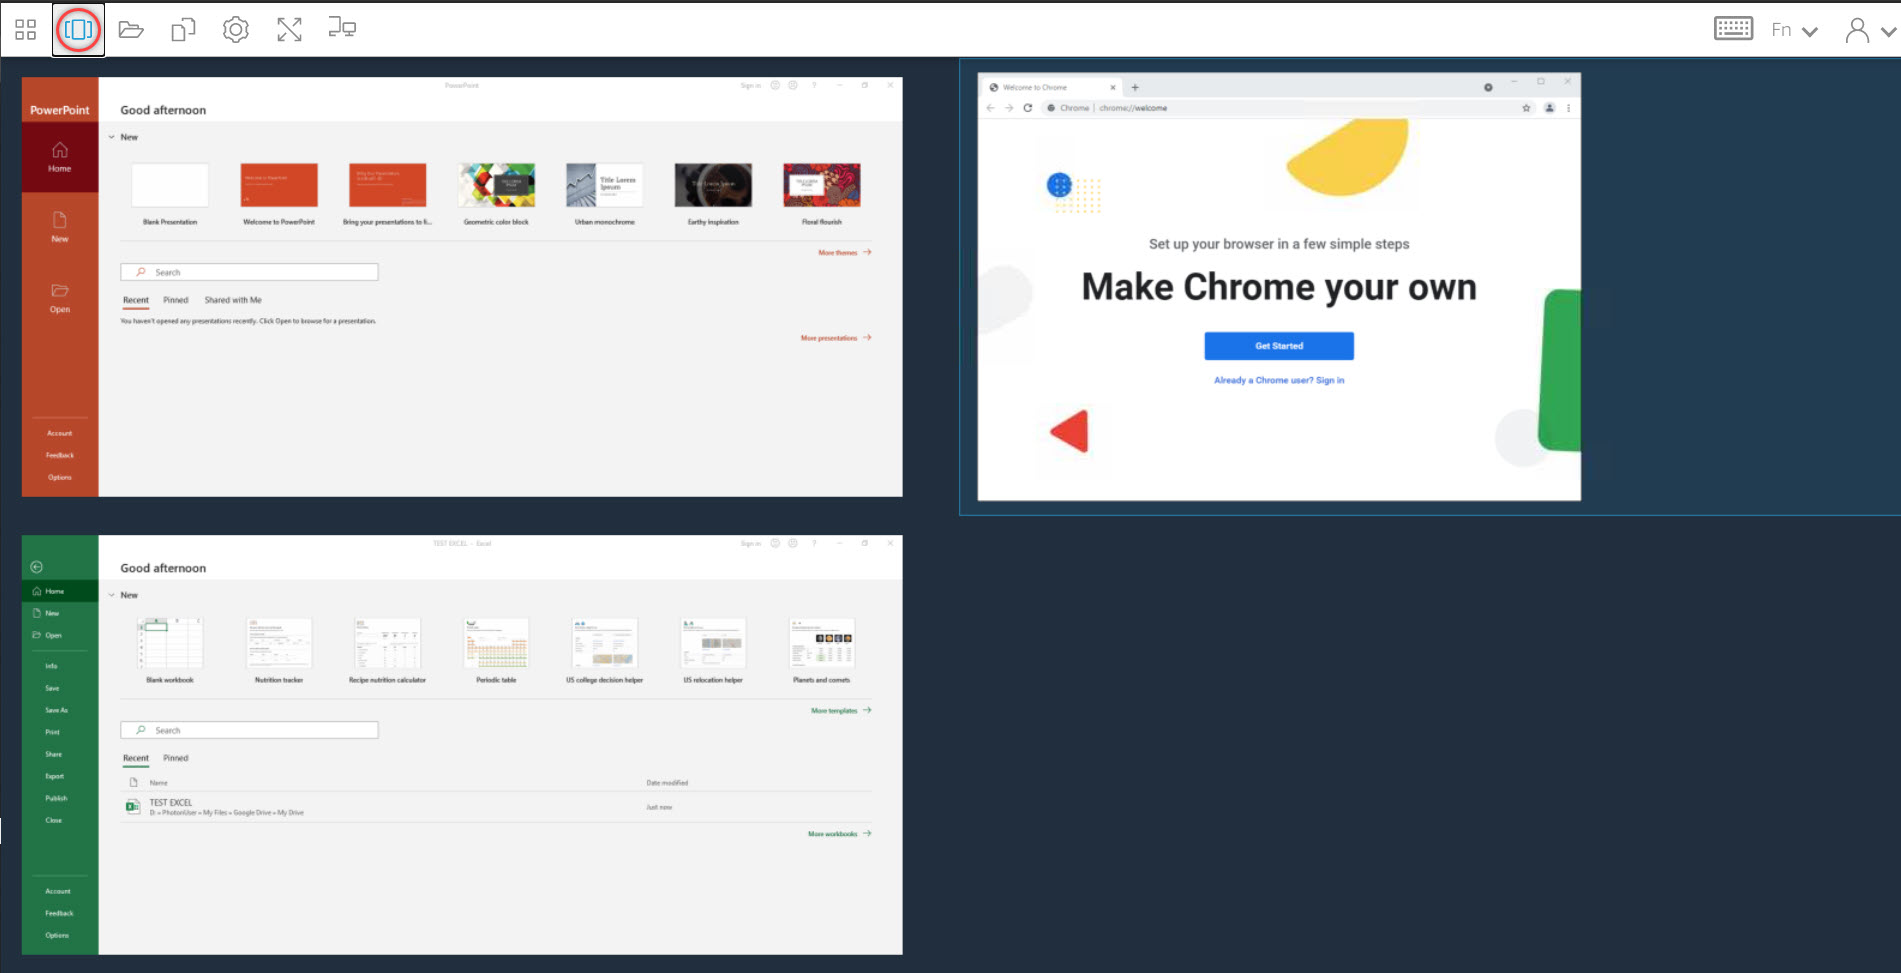
 Any currently running apps will remain open. Click Switch windows (the overlapping rectangles icon in the navigation bar) to view all open apps. Click an app’s window to make it active Copy/Paste with Clipboard in Non-Chrome Browsers

switch_window

If you are using the Chrome browser, you can copy and paste normally between applications running on your device and running in the Virtual Computing environment. You do not need the information on this page if you are using Chrome.

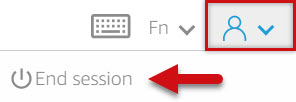
In the AppStream navigation bar, on the right, click the User icon, then select End session.

exit

Your files are NOT automatically saved in Virtual Computing. You need to save your files to your Google Drive before you exit your session, or all work will be lost.

  • Signing into Google Drive File Stream with your NetID in AppStream each time you log on is critical for saving your files. See our Set Up Google Drive for Virtual Computing  KB article for more information.

  • If you close the Google Drive Filestream sign-in window before you successfully sign in, you will need End Session (log off) and click the Apps on Demand button in Canvas again to get a new session.    
Note: Disconnected sessions (closing the web browser) and idle sessions (no keyboard/mouse activity) will stay active for 1 hour and then be automatically logged off. If you fail to reconnect or actively use your session before the 1-hour timeout ends, all your unsaved work will be lost and you will need to start over. Before saving your work often to Google Drive and always save before leaving your computer or doing other things on your computer.

You can access Google-drive from ArcGIS-Pro on Appstream by following these instructions:

  1. If you have not already done so, please setup Google Drive in Appstream
  2. Open the ArcGIS application
  3. To navigate to the Google Drive, Select C:\Users\PhotonUser\My Files\Google Drive (this may take upto 15 seconds to list the sub-directories)
  4. If you would like to save/open a file to/from your Google Drive, select "My Drive".
  5. If you would like to save/open a file to/from a Shared Drive, select "Shared Drives", and then select the name of the appropriate Shared Drive.

Troubleshooting

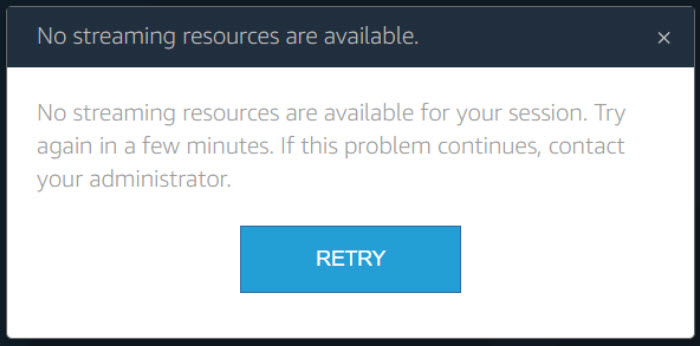
No Streaming Resources

When signing in and a message that "No streaming resources are available for your session," it most likely means that at the time you tried to sign in, all available AppStream sessions were currently in use by other users. App stream will be aware of your attempt to sign in and will begin preparing another session, a process that may take up to 10 minutes. We suggest you wait about 10 minutes, then click RETRY.

Requesting new or upgraded applications in Appstream

Faculty can request new applications on Appstream by logging into ServiceNow using your NETID.

Next select "Order Something", in category "Teaching & Learning", select "Appstream" and complete the form with the appropriate information.

ps - Appstream will be available to request through ServiceNow in September 2021. If you need to request an application before then, please log a ticket in ServiceNow with the details.